Foam tape for eyelash extensions is a game-changer in the lash industry. It provides comfort, precision, and flexibility, making the lash application process smoother and more effective for both lash artists and clients. In this guide, we’ll break down everything you need to know about using foam tape for eyelash extensions, including step-by-step instructions, tips for customization, and the benefits it offers.
What is Foam Tape for Eyelash Extensions?
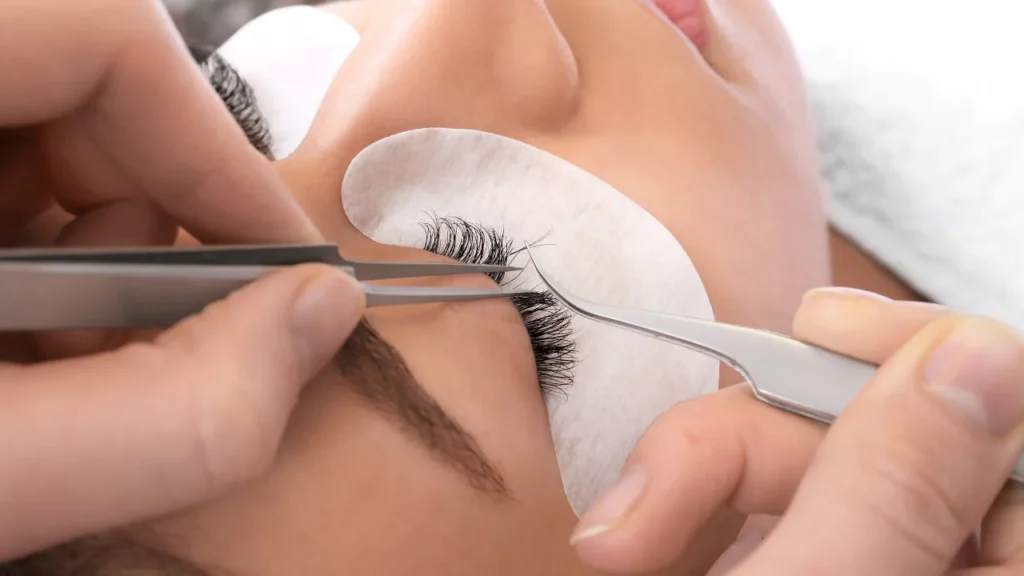
Foam tape is a soft, flexible material used to secure the lower lashes during the lash extension process. Unlike traditional tapes, foam tape is gentler on the skin, minimizes irritation, and allows for better isolation of lashes.
Benefits of Foam Tape:
•Comfortable for Clients: The soft texture is ideal for sensitive skin.
•Customizable: Easily cut and shaped to fit the client’s eye shape.
•Effective Isolation: Ensures better visibility and separation of natural lashes.
Step-by-Step Guide to Applying Foam Tape
1. Prepare Your Workspace
Before beginning, ensure you have all the necessary tools:
- Foam tape
- Scissors
- Tweezers
- A magnifying lamp
Keep your area clean and organized to maintain a hygienic environment.
2. Cut and Customize the Foam Tape
Foam tape can be tailored to fit each client’s unique eye shape.
- Measure and Cut: Cut small strips of foam tape to match the length of the lower lash line.
- Adjust for Comfort: Round the edges to prevent sharp corners from irritating the skin.
3. Prep the Client’s Eye Area
- Clean the Lashes: Use a gentle lash cleanser to remove any oils or residue.
- Dry Thoroughly: Ensure the lashes are completely dry before applying tape.
4. Apply the Foam Tape
- Positioning: Ask the client to look upward. Gently place the foam tape on the lower lash line, ensuring all lower lashes are covered.
- Check for Comfort: Make sure the tape does not pull or irritate the skin. Adjust as needed.
5. Secure the Foam Tape
Use your tweezers to press the foam tape lightly against the skin, ensuring it stays in place throughout the application.
6. Begin the Lash Application Process
With the foam tape securely in place, you can now isolate and apply extensions with ease. The tape’s flexibility ensures that the lashes are positioned optimally for precise application.
Tips for Using Foam Tape Effectively
- Practice Makes Perfect: Experiment with cutting and positioning foam tape to find the best fit for different clients.
- Communicate with Clients: Ask if they feel any discomfort and adjust the tape if necessary.
- Use Quality Products: Invest in high-quality foam tape designed specifically for eyelash extensions to avoid irritation.
Why Choose Foam Tape Over Traditional Methods?
Foam tape for eyelash extensions offers several advantages over traditional eye pads and tapes:
- Better Adhesion: Stays securely in place without slipping.
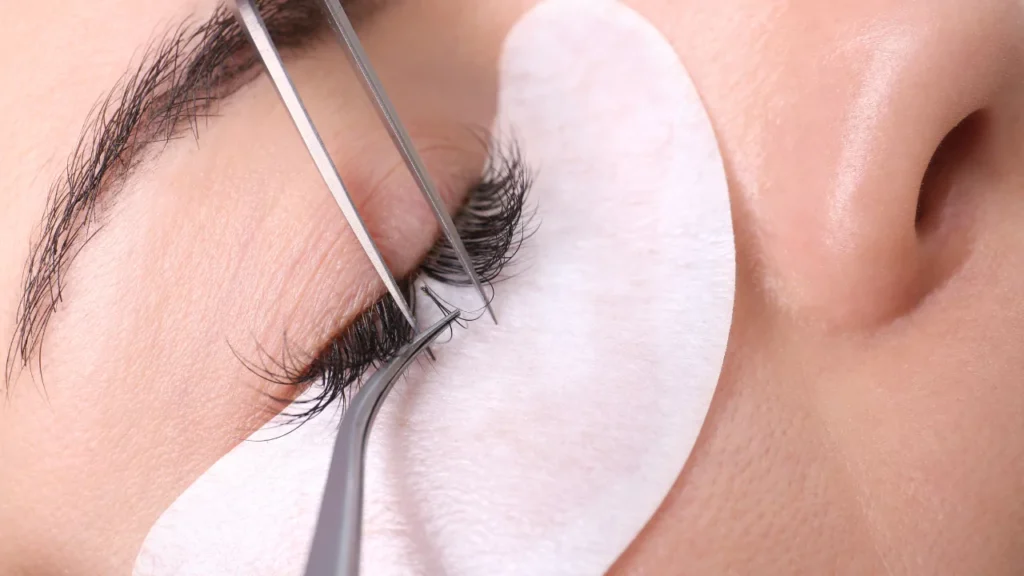
- Improved Visibility: Lifts and separates lashes for more precise application.
- Gentle Removal: Easy to peel off without pulling the skin.
Common Mistakes to Avoid
- Using Too Much Tape: Overlapping layers can create discomfort for the client.
- Improper Placement: Ensure the foam tape does not press too tightly against the eyeball.
- Skipping Client Feedback: Always check with your client to ensure they’re comfortable.
Where to Buy Foam Tape for Eyelash Extensions
Foam tape is widely available from professional lash suppliers and online beauty stores. Look for products specifically designed for lash applications to ensure quality and safety.
Conclusion
Foam tape for eyelash extensions is a versatile and essential tool for any lash artist. By mastering its application, you can provide a more comfortable and professional experience for your clients. With its ability to customize, isolate, and protect, foam tape elevates the precision and quality of your lash artistry.
Ready to perfect your lash application technique? Explore our lash training programs to learn more about advanced tools and methods that enhance your skills and transform your lash business.
Get in touch with Limitlashes™
- Call Us: (781) 996-4048
- Email Us: [email protected]
- Send DM: Instagram
- YouTube Channel: Lash Tutorials
- Podcast: My Lash Journey
- Free Lash Class: Online Lash MasterClass
