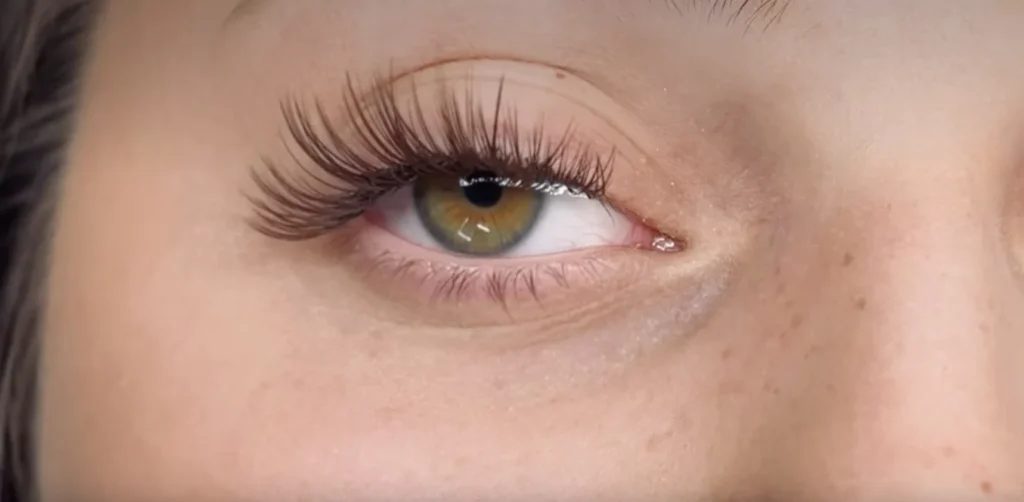
The wet lash look is a game-changer in the lash industry, offering a sleek, glossy, and wispy finish that enhances natural beauty. This style mimics the look of lashes when they are wet—hence the name—by creating delicate spikes using volume lashes. If you want to master this style, this comprehensive guide will take you through the step-by-step process of achieving the wet lash look, along with expert tips, product recommendations, and troubleshooting solutions.
Whether you are a lash artist looking to perfect your technique or a client wanting to try something new, understanding the wet lash look is essential. Let’s dive deep into what makes this style unique, how to achieve it, and the best practices to ensure long-lasting results.
What Is the Wet Lash Look?
The wet lash look is a lash extension technique that involves creating defined, spiky, and slightly textured lashes. Unlike traditional volume sets, where the fans are fanned out, this look keeps the lashes together at the base, giving them a sleek and glossy appearance. It enhances the natural lashes while adding volume and dimension without looking too dense or heavy.
This trend is perfect for those who love the wispy lash look but want a bit more texture and definition. It’s also an excellent option for clients who prefer a more effortless, natural look rather than a dramatic, bold set of lashes.
Benefits of the Wet Lash Look
The wet lash look offers multiple benefits, making it a highly sought-after style in the lash industry. Some of the key advantages include:
- Natural yet bold – This style gives the appearance of wet, glossy lashes without looking overly dramatic.
- Lightweight and comfortable – Unlike dense volume fans, this method keeps lashes lightweight, reducing strain on the natural lashes.
- Perfect for any eye shape – The technique can be customized to flatter different eye shapes and client preferences.
- Long-lasting retention – Since the base of the lashes remains closed, it can enhance retention compared to regular volume fans.
- Effortless and stylish – The sleek, wet appearance provides an effortlessly chic look that doesn’t require mascara.

Step-by-Step Tutorial: How to Achieve the Wet Lash Look
1. Prepping the Natural Lashes
Before beginning the wet lash look, proper preparation is essential.
- Cleanse the lashes – Use a gentle lash cleanser to remove any makeup, oil, or debris. A foam cleanser works best for deep cleaning.
- Rinse thoroughly – Make sure there is no residue left behind, as this can affect retention.
- Dry and brush – After rinsing, gently pat the lashes dry and brush them through with a spoolie.
2. Eye Patch and Tape Application
Once the lashes are clean, apply gel eye pads to protect the under-eye area.
- Use sensitive tape to secure lower lashes in place.
- Ensure that the tape does not touch the waterline to avoid discomfort.
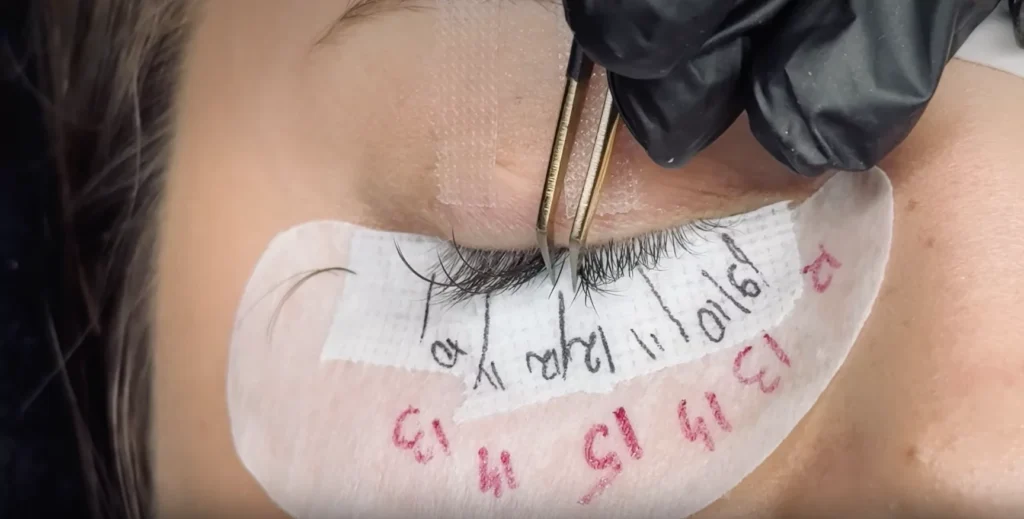
3. Lash Mapping for the Wet Lash Look
Lash mapping is essential for creating a well-balanced and symmetrical wet lash look. This technique ensures that the lash set enhances the client’s eye shape while maintaining the signature wispy effect.
Here’s a standard lash map for an open-eye effect:
- Outer corner: 13-14 mm
- Middle: 15 mm (longest spike)
- Inner corner: 10-12 mm
To add dimension:
- The spikes (or closed-volume fans) should be placed strategically on the top lash layer.
- The shorter lashes fill in the gaps to maintain a natural yet wispy texture.
4. Creating and Applying the Spikes
The key to a wet lash look is forming the right spikes.
- Pick up 3-5 lashes (0.07 thickness recommended).
- Dip the base in adhesive while keeping the tip closed.
- Attach the spike to a natural lash with precision.
For a seamless blend, vary the spike lengths to add dimension and texture. This technique ensures that the wet lash look appears wispy yet structured, achieving the perfect balance between natural and dramatic.
5. Layering for Dimension
To achieve a natural yet full wet lash look:
- First layer: Place the longest spikes here.
- Second layer: Use slightly shorter lashes to add depth.
- Bottom layer: Keep it subtle with short lashes (e.g., 9-11 mm).
By layering properly, you can enhance the wet lash look and create a beautiful, fluffy effect that still maintains the sleekness of the style.
6. Finishing Touches
After completing the lash application:
- Check symmetry with a mirror – Ensure the spikes are aligned.
- Brush through the lashes – This keeps them fluffy and well-spaced.
- Seal with a nano mister – A light mist helps cure the adhesive and reduces irritation.
Common Mistakes and How to Avoid Them
Achieving the wet lash look requires precision and attention to detail. Here are some common mistakes and how to fix them:
1. Spikes Not Holding Their Shape
Solution: Use the correct adhesive (medium-drying works best) and ensure proper glue placement at the base.
2. Uneven Lash Placement
Solution: Always use lash mapping to guide placement and maintain symmetry.
3. Lashes Look Too Sparse
Solution: Fill in gaps with shorter lashes while keeping the spikes prominent.
4. Overuse of Thick Lashes
Solution: Stick to 0.07 or 0.10 lashes to maintain the delicate, wispy appearance of the wet lash look.
Best Products for Achieving the Wet Lash Look
To get the best results, use high-quality products, including:
- Lash Cleanser: Limit Lashes Foam Cleanser
- Lash Extensions: 0.07 or 0.10 lashes (mix of C, CC, and D curls)
- Lash Adhesive: Fast-drying glue for precise application
- Tweezers: Precision tweezers for easy pickup and placement
Using the right products will ensure that the wet lash look stays intact and looks flawless from application to fill.
Why the Wet Lash Look Is a Must-Try
The wet lash look has gained popularity due to its elegant and lightweight feel. Unlike traditional volume lashes that create a dense, dramatic effect, this style keeps things soft, natural, and wispy. It’s perfect for clients who want a sophisticated yet effortless look that doesn’t require extra makeup.
This technique is also versatile. Lash artists can customize it to enhance different eye shapes, making it a fantastic option for a wide range of clients. Whether someone prefers a subtle enhancement or a more defined, spiky look, the wet lash look can be tailored to their preference.
Final Thoughts
The wet lash look is a revolutionary lash trend that combines wispy elegance with a glossy, defined texture. By following this step-by-step guide, lash artists can perfect this technique and deliver stunning results for their clients.
For those looking to elevate their lash artistry, mastering the wet lash look is a must. This style offers the perfect balance of structure, fluffiness, and shine, making it a timeless addition to any lash artist’s repertoire.
Get in touch with Limitlashes™
- Call Us: (781) 996-4048
- Email Us: cosmy@limitlashes.com
- Send DM: Instagram
- YouTube Channel: Lash Tutorials
- Podcast: My Lash Journey
- Free Lash Class: Online Lash MasterClass