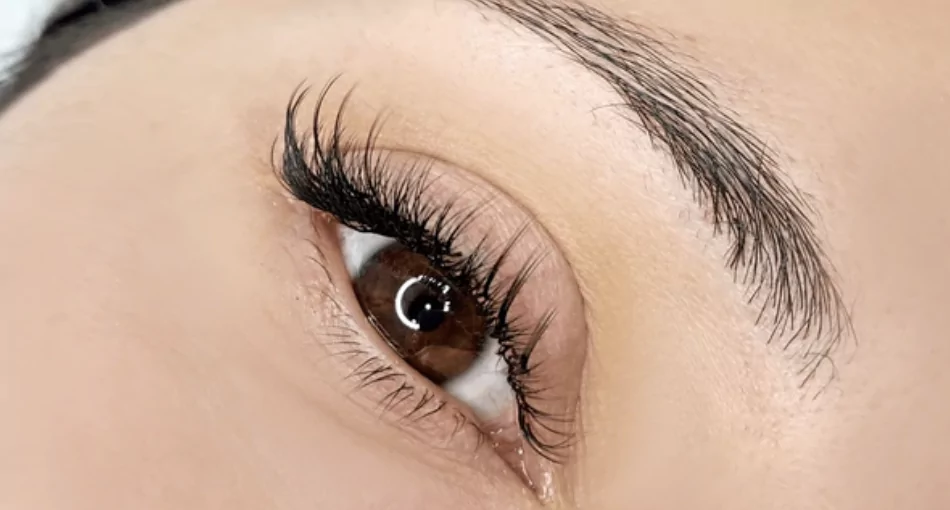
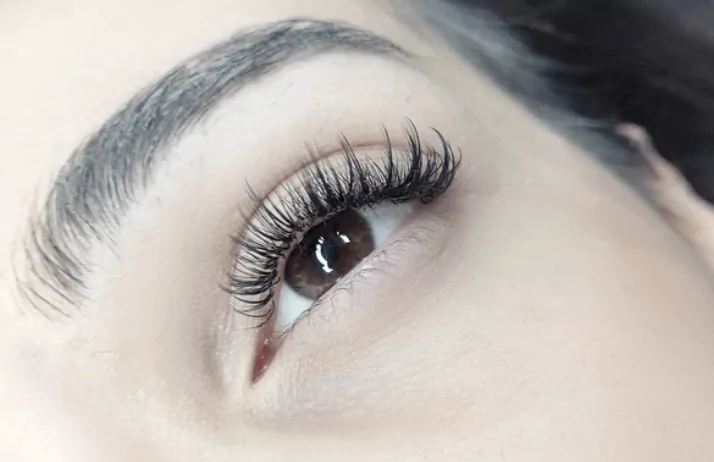
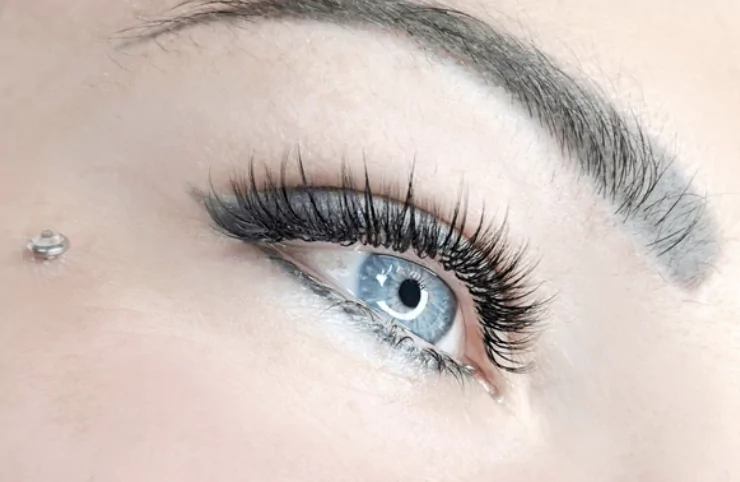
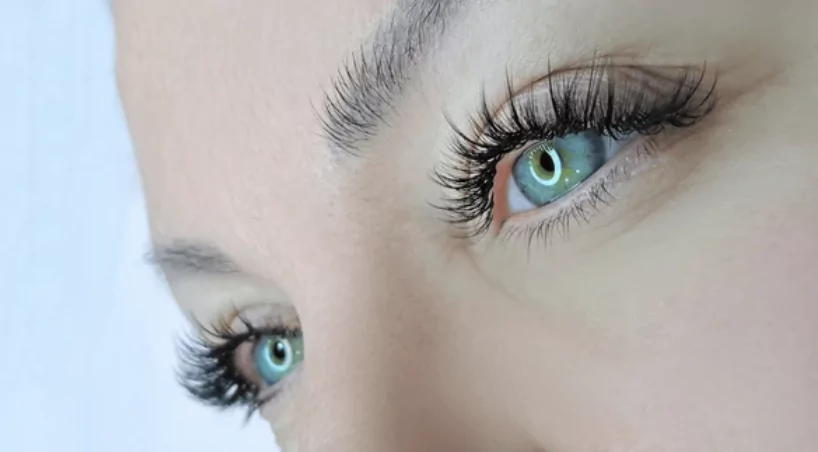
Wispy classic lashes have become one of the most sought-after lash styles in the beauty industry. Known for their soft, feathered appearance and elegant definition, wispy classic lashes strike the perfect balance between natural and glamorous. They enhance the eyes with a delicate, staggered effect, making them ideal for clients who want a timeless yet eye-catching look.
In this guide, we’ll dive deep into everything you need to know about wispy classic lashes, including application techniques, lash mapping, styling tips, and expert tricks to help you perfect this stunning lash style.
What Are Wispy Classic Lashes?
Wispy classic lashes are a variation of classic lash extensions but with added texture and dimension. Unlike traditional classic lashes, where each extension is the same length, wispy classics incorporate spikes—longer lash extensions placed strategically to create a fluttery, wispy effect.
The key to achieving wispy classic lashes is alternating between different lash lengths and thicknesses. This creates a soft, natural look with subtle volume and a beautiful, airy finish.
Why Wispy Classic Lashes Are So Popular
Lash clients love wispy classic lashes because they:
- ✅ Provide a natural yet defined look
- ✅ Add texture and dimension without being too dramatic
- ✅ Complement various eye shapes and enhance the lash line
- ✅ Work well for clients who prefer a softer, more effortless lash style
- ✅ Are lightweight and comfortable for long-term wear
Now, let’s break down how to create the perfect wispy classic lashes step by step.
Wispy Classic Lash Mapping: The Foundation of a Stunning Look
Step 1: Understanding Lash Length & Placement
Before applying wispy classic lashes, you need to create a lash map. Mapping ensures that the spikes and classic extensions are placed correctly for the best visual impact.
📌 Key Lash Mapping Rules for Wispy Classics:
- Always work with two different curl types and two different thicknesses (e.g., C and CC curls, or 0.15mm and 0.10mm thickness).
- Spikes should be 3-4mm longer than the client’s natural lashes.
- The lower lashes should be 80-90% covered to create a darker lash line, while spikes remain more sparse.
- Aim for 15-20 spikes per eye, evenly distributed.
Step 2: Sectioning the Eye for Precision
To make application easier, divide the lash line into sections:
- Inner Corner (Shorter Lashes) – Start with 8-10mm extensions for a natural transition.
- Middle Section (Longest Lashes) – Use 12-14mm spikes to create the wispy effect.
- Outer Corner (Gradual Tapering) – Blend with 9-11mm lashes for a seamless finish.
Using a layering technique (one spike, one classic, one spike, etc.) will create the up-and-down pattern that defines wispy classic lashes.
How to Apply Wispy Classic Lashes Like a Pro
Step 1: Selecting the Right Lash Extensions
For wispy classic lashes, you should mix different thicknesses and curls:
- Spikes: Use 0.15mm or 0.10mm lashes for boldness.
- Classic Lashes: Apply 0.10mm, 0.07mm, or 0.05mm lashes to add depth and density.
Using these variations will create a more natural yet textured look.
Step 2: Applying Spikes for a Wispy Effect
Spikes are the defining feature of wispy classic lashes. To create them:
- ✅ Pick three to four individual lashes and bond them together with adhesive.
- ✅ Use longer lengths (3-4mm longer than the natural lash) to make the spikes stand out.
- ✅ Space them evenly across the lash line to avoid an unbalanced look.
A common mistake is placing spikes too close together, which can make the lashes look messy instead of wispy.
Step 3: Filling in the Lower Lash Line for Depth
Once your spikes are placed, you need to fill in the bottom layer to create contrast.
- ✅ Use shorter lashes (8-10mm) to cover 80-90% of the lash line.
- ✅ Apply them between the spikes for a balanced finish.
- ✅ Check your work with a small mirror to ensure even coverage.
This layering technique makes the base look darker while allowing the spikes to stand out, creating a soft, wispy texture.
Tips for Perfecting Wispy Classic Lashes
✨ Tip 1: Choose the Right Adhesive – Use a fast-drying, lightweight adhesive to prevent clumping.
✨ Tip 2: Customize for Each Client – Adjust the length and density based on the client’s natural lashes.
✨ Tip 3: Always Check with a Mirror – Step back and check the symmetry of your spikes from different angles.
✨ Tip 4: Don’t Overload the Lash Line – Too many spikes can make the set look unnatural; stick to 15-20 spikes per eye.
✨ Tip 5: Use the Right Tools – Precision tweezers and a nano-mister can improve retention and help with accurate placement.
Maintaining Wispy Classic Lashes
Once your client has their wispy classic lashes, proper aftercare is essential. Here’s how they can make their lashes last longer:
- 🚿 Avoid Water & Steam for 24 Hours – This prevents premature lash loss.
- 🛏️ Sleep on Your Back – Reduces friction that can disturb the spikes.
- 💨 Use an Oil-Free Lash Cleanser – Keeps lashes clean without breaking down the adhesive.
- 🪄 Brush Lashes Daily – Keeps them fluffy and prevents tangling.
- 📆 Schedule Regular Fills – Touch-ups every 2-3 weeks maintain the wispy effect.
Wispy Classic Lashes vs. Other Lash Styles
Wispy Classic Lashes vs. Classic Lashes
- ✅ More texture & definition
- ✅ Uses spikes for a feathery look
- ✅ Adds dimension without extra volume
Wispy Classic Lashes vs. Volume Lashes
- ✅ Lighter & more natural-looking
- ✅ Less dense, making them ideal for everyday wear
- ✅ Perfect for clients who want subtle drama
Wispy Classic Lashes vs. Hybrid Lashes
- ✅ More structured than hybrids
- ✅ Provides a soft, fluttery effect
- ✅ Best for clients who prefer an effortless yet defined style
Conclusion
Wispy classic lashes are the perfect choice for clients looking for a natural yet beautifully textured lash look. By mastering proper lash mapping, strategic spike placement, and layering techniques, lash artists can create stunning wispy classic lashes that enhance any eye shape.
Whether you’re a beginner lash artist or an experienced professional, understanding how to apply and style wispy classic lashes will help you elevate your lash game and satisfy your clients with flawless, long-lasting results.
If you’re ready to perfect your wispy classic lash technique, start practicing these methods today and watch your lash artistry transform!
Get in touch with Limitlashes™
- Call Us: (781) 996-4048
- Email Us: [email protected]
- Send DM: Instagram
- YouTube Channel: Lash Tutorials
- Podcast: My Lash Journey
- Free Lash Class: Online Lash MasterClass