Lash fills are an essential service for lash artists aiming to maintain their clients’ perfect lash extensions while promoting healthy natural lash growth. Mastering the art of lash fills requires precision, technique, and a deep understanding of both products and client needs. This guide provides a comprehensive breakdown of every step in the lash fill process, from preparation to application, to help you consistently achieve stunning results.
Understanding Lash Fills
A lash fill replaces eyelash extensions that have shed naturally or become misaligned, restoring the voluminous, polished look of the original set. Since natural lashes shed in cycles—losing about 2-5 lashes daily—regular lash fills every 2-3 weeks ensure that clients maintain their desired lash style.
Why Lash Fills Are Important
Lash fills play a critical role in lash maintenance. They:
- Enhance Longevity: Extend the lifespan of lash extensions by replacing missing or damaged ones.
- Preserve Appearance: Keep the lash set looking full and balanced.
- Support Natural Lash Health: By removing outgrown extensions, lash fills prevent unnecessary stress on natural lashes.
Tools and Products for Lash Fills
Using the right tools and products is crucial to the success of a lash fill. Ensure you have the following essentials:
- Cleaning Supplies: Lash foam cleanser, soft brushes, and bottled water.
- Prep Materials: Gel pads, foam tape, and sanitizer.
- Application Tools: High-quality lash tweezers, lash adhesive, lash extensions, and glue palettes.
- Finishing Touches: Glue shaker, nanomister, and lash brushes.
High-quality materials not only improve results but also enhance client retention by delivering a comfortable, long-lasting experience.
Preparing Your Client for a Lash Fill
Proper preparation is key to a successful lash fill. Begin by ensuring a clean and sanitized workspace. Greet your client warmly, seat them comfortably, and discuss their lash concerns and preferences.
- Sanitize: Wash your hands and sanitize your tools to minimize the risk of infection.
- Assess Lash Condition: Examine the client’s lashes to determine retention levels and identify problem areas.
- Client Consultation: Confirm the style they wish to maintain, whether it’s natural, dramatic, or somewhere in between.
Step 1: Cleaning the Lashes
A thorough cleaning is essential for optimal glue adhesion. Start by removing makeup, oil, and dirt from the lashes.
- Apply Foam Cleanser: Dispense a pump of lash foam cleanser onto a soft brush. Gently cleanse the lashes, focusing on the base.
- Rinse and Dry: Use bottled water to rinse off the cleanser, ensuring no residue remains. Pat the lashes dry with a lint-free towel.
- Brush Lashes: Comb through the lashes with a disposable spoolie to separate and align them.
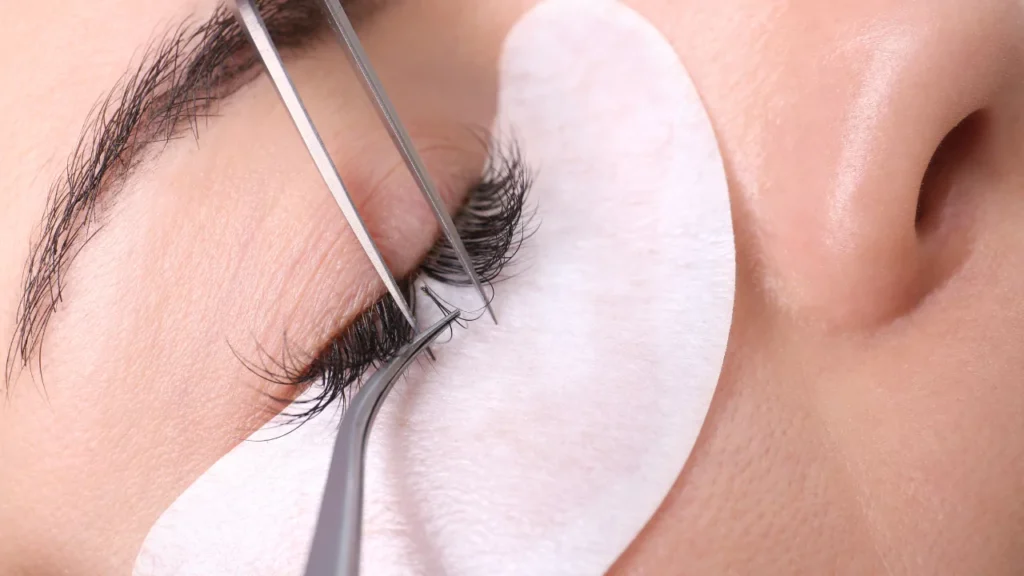
Step 2: Isolating the Bottom Lashes
To prevent lower lashes from interfering with the application process, they must be secured.
- Apply Gel Pads: Position gel pads under the client’s eyes to protect their skin and isolate the lower lashes.
- Use Foam Tape: Add foam tape to lift the upper lid slightly for better visibility and precision.
Step 3: Removing Outgrown Extensions
Overgrown extensions can create uneven lash lines and strain natural lashes. Removing these extensions is an important part of the fill process.
- Isolate Outgrown Extensions: Use tweezers to separate outgrown extensions.
- Gently Remove Extensions: Hold the natural lash firmly and carefully slide off the extension using tweezers. This minimizes damage to the natural lash.

Step 4: Selecting the Right Products
The choice of lash extensions and adhesive can make or break the final result.
- Choose High-Quality Extensions: Opt for lightweight extensions, such as 0.07mm C Curl lashes, to create a natural and elegant look.
- Use a Reliable Adhesive: Select a fast-drying adhesive with excellent retention to ensure durability and comfort for the client.
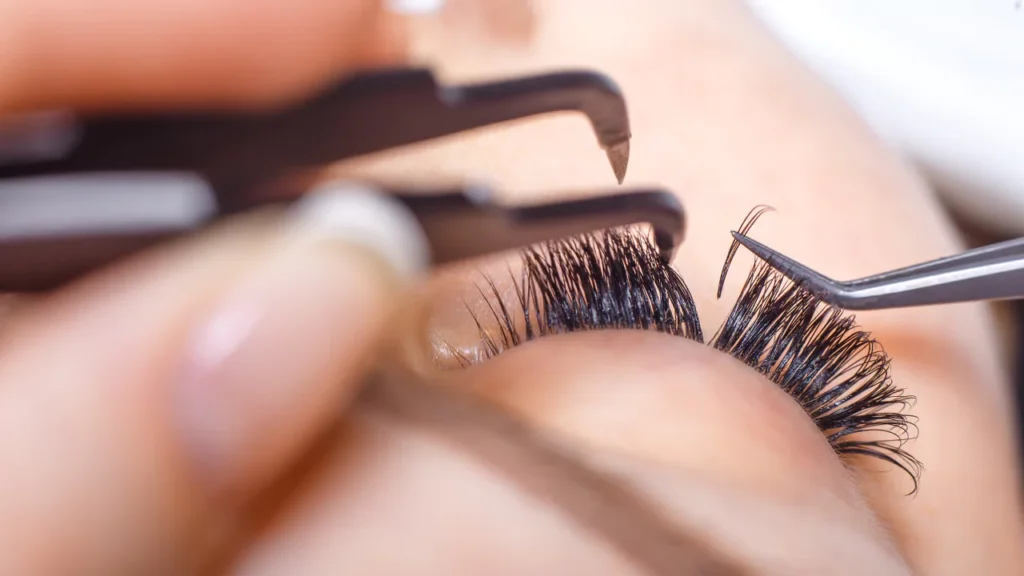
Step 5: Applying the New Extensions
The application process is where your skill as a lash artist truly shines.
- Prepare the Adhesive: Shake the adhesive using a glue shaker for even consistency. Dispense a small amount onto a glue palette.
- Isolate Natural Lashes: Use your tweezers to isolate a single natural lash, ensuring no overlapping.
- Attach the Extension: Dip the base of the lash extension into the adhesive and carefully attach it to the isolated lash. Maintain a consistent angle and spacing for a seamless result.
Repeat this process until all gaps are filled, balancing the lash line for an even, voluminous appearance.
Step 6: Finishing Touches
After applying the new extensions, take time to refine and secure your work.
- Brush Through Lashes: Comb the extensions to ensure they are not stuck together and sit in the desired direction.
- Seal with a Nanomister: Lightly mist the lashes to cure the adhesive and reduce sensitivity. Avoid over-misting to prevent weakening the bond.
- Inspect Your Work: Examine the lash set for any irregularities and make final adjustments.
Post-Application Care
Before your client leaves, provide clear aftercare instructions to maximize the longevity of their lash extensions.
- Avoid Moisture: Advise clients to keep their lashes dry for the first 24 hours to allow the adhesive to cure fully.
- Daily Cleaning: Recommend cleaning the lashes daily with a gentle foam cleanser to prevent buildup.
- No Oil-Based Products: Inform clients to avoid oil-based cleansers and makeup removers, as these can break down the adhesive.
- Gentle Handling: Remind clients not to rub their eyes or pull on their extensions.
Troubleshooting Common Issues
Even experienced lash artists encounter challenges during fills. Here’s how to address some common problems:
- Clumped Lashes: Use tweezers to separate clumped extensions and ensure even spacing.
- Poor Retention: Reassess your adhesive and application technique, as improper bonding or dirty lashes can reduce retention.
- Uneven Lash Loss: Advise clients on sleep positions and aftercare to minimize uneven shedding.
Why Precision Matters in Lash Fills
Lash fills are not just about adding more extensions; they require attention to detail and respect for the natural lash cycle. By prioritizing quality over speed, you can ensure that each fill looks flawless and feels comfortable for the client.
Building Client Loyalty Through Lash Fills
Your expertise in lash fills can turn one-time clients into loyal patrons. Follow these tips to enhance their experience:
- Communicate Effectively: Keep clients informed about the process and aftercare.
- Maintain Professionalism: Ensure cleanliness, punctuality, and a relaxing environment.
- Focus on Retention: Regular fills and proper education on aftercare will help clients see the value in your services.
Conclusion
Performing a lash fill is both an art and a science. By mastering the steps outlined in this guide—preparation, cleaning, removal, application, and finishing—you can deliver exceptional results that keep your clients coming back. Always prioritize quality, precision, and client satisfaction to elevate your lash artistry and grow your business. With dedication and attention to detail, every lash fill can be a masterpiece.
Ready to elevate your lash artistry or achieve flawless lash extensions? At Limitlashes™, we offer top-tier lash training programs designed to help you master advanced techniques and grow your lash business with confidence. Whether you’re an aspiring lash artist or a seasoned professional, our training provides the skills and knowledge you need to stand out in the industry.
Looking for lash extension services? Experience the artistry and precision of Limitlashes™ with customized lash extensions that enhance your natural beauty while prioritizing lash health.
Get in touch with Limitlashes™
- Call Us: (781) 996-4048
- Email Us: cosmy@limitlashes.com
- Send DM: Instagram
- YouTube Channel: Lash Tutorials
- Podcast: My Lash Journey
- Free Lash Class: Online Lash MasterClass