Wispy lashes have taken the beauty industry by storm, becoming a go-to choice for clients who want a natural yet dramatic look. Whether you’re an aspiring lash artist or a seasoned professional looking to refine your technique, mastering wispy volume sets is essential. In this comprehensive guide, we’ll walk you through everything you need to know about creating the perfect wispy lash set—step by step.
What Are Wispy Lashes?
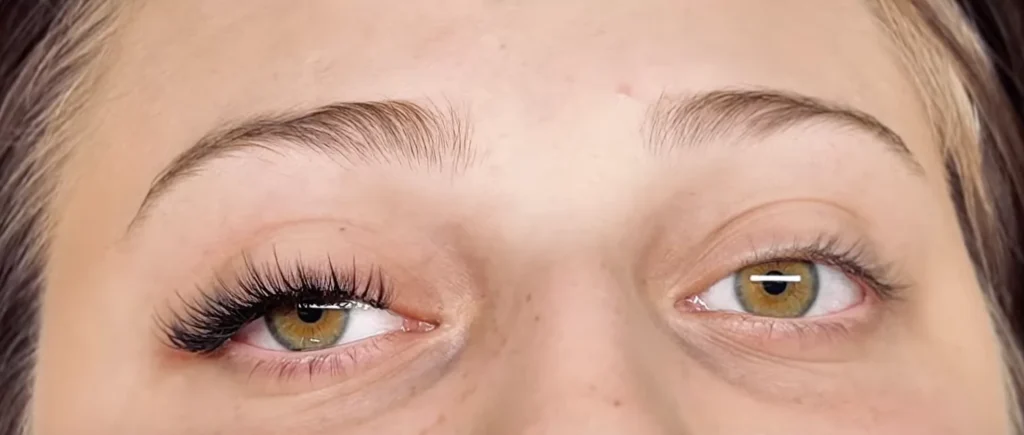
Wispy lashes are a lash extension style that combines varying lengths, creating a feathery, textured look. This technique mimics natural lashes while adding volume and definition. The key to a successful wispy lash set is strategically placing longer “spikes” among volume fans to achieve a soft, fluttery appearance.
Why Are Wispy Lashes So Popular?
Wispy lashes offer a balance between volume and natural appeal, making them ideal for clients who want:
- A glamorous yet lightweight lash look
- Customization for different eye shapes
- A natural, feathery finish that complements facial features
Step-by-Step Guide to Creating Wispy Lashes
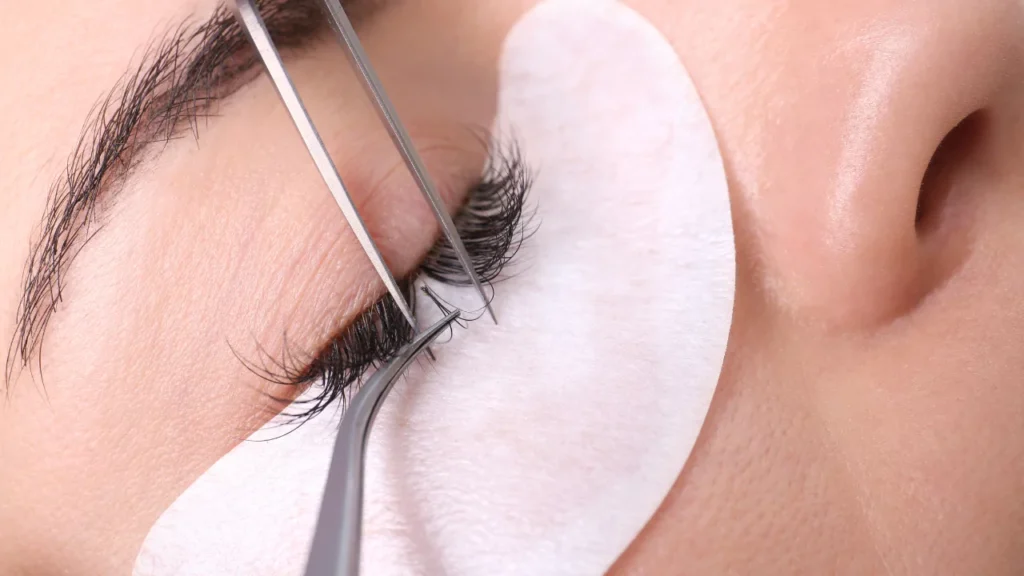
Step 1: Preparing the Eyes
Before applying wispy lashes, proper preparation is crucial to ensure longevity and a flawless finish.
- Clean the lashes thoroughly – Even if the client isn’t wearing makeup, natural oils and residue can interfere with lash retention. Use a gentle foam cleanser like Limit Lashes’ foam cleanser to clean the lash line.
- Pat dry the lashes – Avoid rubbing. Instead, gently pat the lashes with a paper towel to remove excess moisture.
- Rinse thoroughly – Ensure all cleanser residue is removed by rinsing with lukewarm water.
- Fan dry the lashes – Using a lash fan, dry the lashes completely before starting the application.
Step 2: Securing the Bottom Lashes
To prevent the bottom lashes from interfering with the application:
- Use gel pads – Carefully place gel pads under the eyes, ensuring they don’t touch the eyeball.
- Secure with medical-grade tape – Use small pieces of paper or plastic tape to keep the gel pads in place.
Step 3: Mapping Out the Wispy Lash Design
Lash mapping is essential to creating a wispy effect with balanced spikes and volume fans.
- Identify key placement areas – Divide the lash line into three sections: inner corner, center (pupil area), and outer corner.
- Select the longest spike lengths – Use lengths ranging from 11mm to 13mm for a noticeable wispy effect.
- Keep the base short – Use shorter lashes (9mm-10mm) to support the longer spikes.
- Adjust for inner and outer corners – Use 9mm to 10mm lengths for a seamless transition.
Step 4: Layering and Spike Placement
Wispy lashes can be created using different layering techniques:
Technique 1: Bottom Layer Spikes
- Use tape to isolate the first (bottom) lash layer.
- Apply longer spikes first using 0.10mm classic lashes.
- Ensure even spacing between spikes to maintain a wispy look.
Technique 2: Top Layer Spikes
- Cover the lower lashes with a gel pad or tape.
- Pick up the top lash layer and apply the spikes.
- This technique helps prevent clumping and ensures even distribution.
Step 5: Volume Fan Placement
To balance the spikes, place volume fans between them:
- Use 0.07mm fans for a soft, lightweight effect.
- Apply shorter fans (9mm-11mm) to blend with the spikes.
- Use a CC curl to match the natural lash curvature.
Step 6: Checking for Symmetry
Before completing the set:
- Use a handheld mirror to check for missing spikes.
- Ensure the spikes are aligned and evenly spaced.
- Fill any gaps with additional fans or spikes as needed.
Step 7: Final Touches and Aftercare Advice
- Remove the tape and gel pads gently.
- Brush through the lashes with a spoolie to ensure they are not stuck together.
- Fan dry the lashes one last time.
- Advise the client on aftercare:
- Avoid water for 24 hours.
- Use oil-free lash cleansers.
- Avoid rubbing or pulling the extensions.
Common Mistakes to Avoid When Creating Wispy Lashes
1. Overcrowding the Spikes
Adding too many spikes can create a messy, unstructured look. Keep them evenly spaced for a balanced effect.
2. Using the Wrong Lash Lengths
Wispy lashes require shorter volume fans and longer spikes. Make sure the longest spike is not overpowering the lash line.
3. Ignoring Natural Lash Growth Patterns
Some natural lashes grow in different directions. Adjust the placement accordingly for a seamless look.
4. Using Heavy Extensions
Avoid using thick or heavy spikes that can weigh down natural lashes and cause poor retention.
Conclusion
Wispy lashes are a stunning choice for those seeking a natural yet voluminous look. By mastering proper preparation, lash mapping, and precise spike placement, you can create a flawless wispy lash set that enhances any client’s eyes. With the right technique and attention to detail, your wispy lash applications will stand out and keep clients coming back for more!
Ready to Master the Art of Wispy Lashes?
At Limitlashes™, we don’t just teach lash artistry alone — we also help you build a thriving lash business. Whether you’re looking to perfect your wispy lash technique, become a certified lash trainer, or scale your lash business to six figures, our expert-led training programs are designed to set you up for success.
👉 Join our Lash Training & Certification Classes to elevate your skills and confidence.
👉 Enroll in our Lash Trainer Course to start teaching and mentoring aspiring lash artists.
👉 Sign up for the Lash Business Class to learn the secrets of branding, marketing, and scaling your lash empire.
💡Take the next step toward your dream lash career today!
Get in touch with Limitlashes™
- Call Us: (781) 996-4048
- Email Us: cosmy@limitlashes.com
- Send DM: Instagram
- YouTube Channel: Lash Tutorials
- Podcast: My Lash Journey
- Free Lash Class: Online Lash MasterClass