Key Takeaways
Wispy Classic Lash Extensions are a beginner-friendly technique that creates texture and dimension using only classic lashes. By placing longer spikes and filling with shorter lashes, you can achieve a soft, natural look without needing volume fans.
Clean mapping, proper spike spacing, and correct lash placement are the foundation of great wispy classic lash extensions. Focus on isolation, glue control, and working in sections to keep the set neat and symmetrical.
- ✔️ Simple Mapping for Beginner Lash Artists
- ✔️ Creating Texture with Spikes and Shorter Base Lashes
- ✔️ Proper Length Difference for Wispy Effect (2–3 mm)
- ✔️ Working with Classic Lashes Only (No Volume Required)
- ✔️ Clean Isolation and Direction for Professional Results
- ✔️ Choosing the Right Lash Adhesive Speed
- ✔️ Working in Sections to Prevent Stickies
- ✔️ Techniques to Keep Spikes Closed and Symmetrical
If you’re a beginner lash artist, one of the biggest challenges you face is learning how to create sets that look professional, balanced, and different from what every other beginner is doing. Many new artists start with standard classic sets, but quickly realize that clients often want something more textured and unique.
The good news is that you don’t need advanced volume techniques to create beautiful results. One of the easiest ways to add texture and style is by learning wispy classic lash extensions.
This guide will walk you through exactly how to create wispy classic lash extensions, including mapping, spike placement, lash lengths, retention tips, and beginner mistakes to avoid. By the end of this article, you’ll understand how to create a stunning wispy lash set using only classic lashes.
What Are Wispy Classic Lash Extensions?
Wispy classic lash extensionsare a textured lash style created by combining different lash lengths to produce a soft “spiky” look. Instead of every lash being the same length, wispy sets include longer spikes placed strategically throughout the lash line.
This technique creates dimension and texture while still maintaining the natural appearance of classic lashes.
Key characteristics of wispy classic lash extensionsinclude:
- Longer spike lashes throughout the set
- Shorter lashes filling the base layer
- Natural texture and separation
- A lightweight look without volume fans
For beginner lash artists, wispy classic lash extensionsare a great technique because they allow you to create more advanced-looking results without needing volume training.
Why Wispy Classic Lash Extensions Are Perfect for Beginners
Many beginner lash artists assume that textured sets require complex volume fans. That’s not true.
In fact, wispy classic lash extensionsare one of the best styles for new lash artists to master because they only require classic lashes while still producing a high-end result.
Here’s why this style works so well for beginners.
1. You Only Need Classic Lashes
To create wispy classic lash extensions, you don’t need to make volume fans or work with extremely thin lashes. You simply combine different lengths of classic lashes.
This keeps the technique simple while still producing texture.
2. The Mapping Is Easy to Learn
The mapping for wispy classic lash extensionsis straightforward and can be adapted to almost any eye shape.
You can use this style for:
- Doll eye mapping
- Cat eye mapping
- Open eye mapping
- Eyeliner effect
3. Clients Love Natural Texture
Many clients don’t want dramatic volume lashes. They want something that looks natural but still noticeable.
That’s exactly what wispy classic lash extensionsprovide.
Visual Guide
Wispy Classic Lash Extensions — 5-Step Method
Create
Wispy Classic Lashes
A beginner-friendly technique to add texture using classic lashes.
01. Map the Lash Set
Divide the lash line into sections and plan where the spikes and shorter lashes will go.
02. Apply the Spikes
Place longer lashes across the lash line to create the wispy spike texture.
03. Fill the Base Layer
Use shorter classic lashes between spikes to add fullness and balance.
04. Check Lash Direction
Keep each lash straight and aligned to maintain a clean wispy look.
05. Lock the Texture
Use water or bonder to keep the spikes closed and the texture defined.
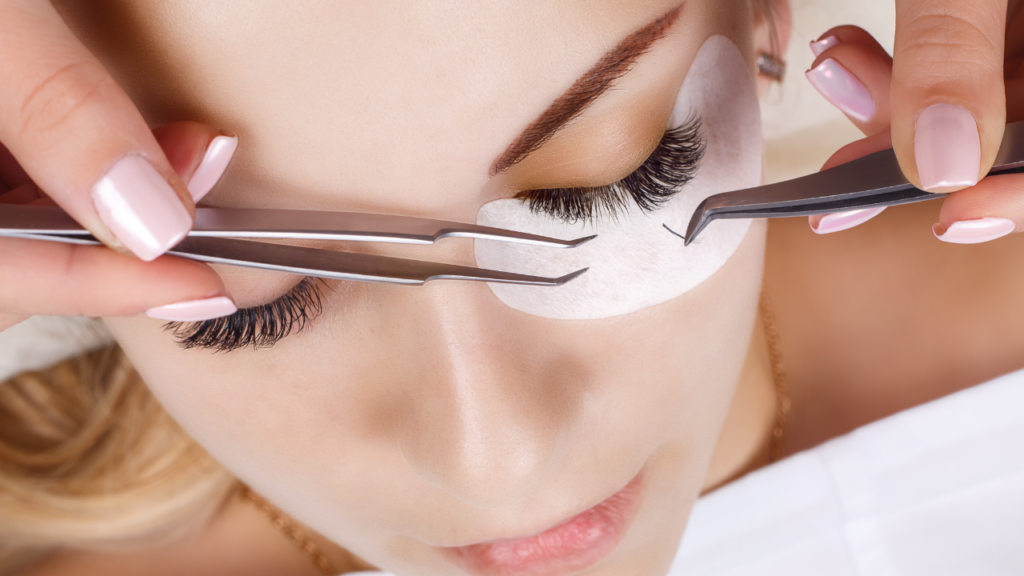
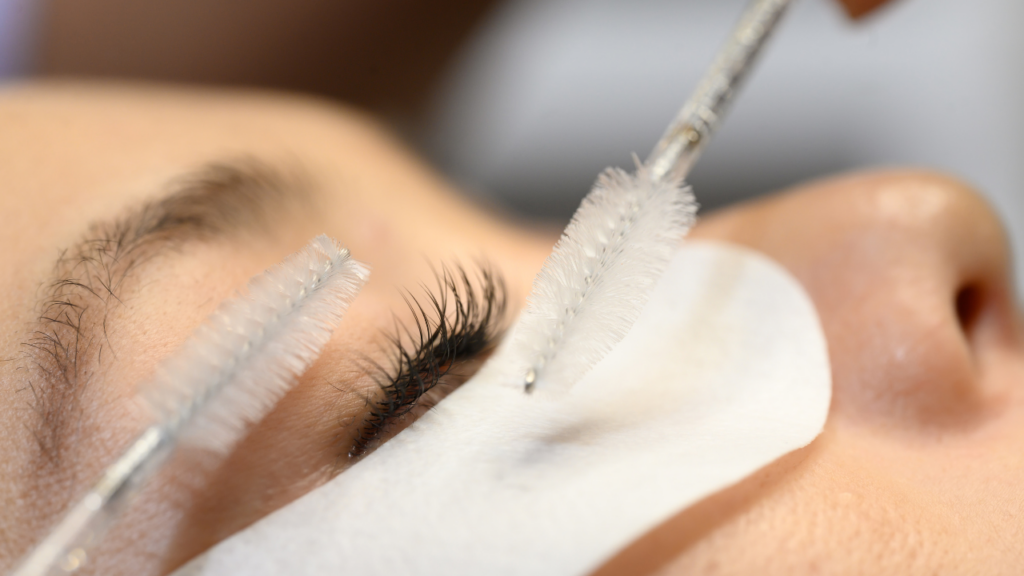
Tools You Need to Create Wispy Classic Lash Extensions
Before starting your application, you need the proper tools.
For wispy classic lash extensions, prepare the following:
Lash Tools
- Isolation tweezers
- Pickup tweezers
- Classic lash trays (0.10 thickness recommended)
- Lash adhesive
- Lash primer
- Spoolie brush
Preparation Supplies
- Gel pads or foam tape
- Lash strips for organization
- Lash mirror for checking symmetry
Having the right tools ready ensures your wispy classic lash extensionsapplication stays organized and efficient.
When Should You Use Lash Primer?
One common question beginner artists ask is about primer.
Primer can help improve lash retention by removing oils and opening the lash cuticle so adhesive bonds better.
However, primer should not be used excessively.
Most lash primers contain alcohol, which means overusing them can dry out the natural lashes. Because of this, many experienced artists only use primer when necessary.
You may want to use primer when:
- The client has very oily skin
- Retention problems occur
- The natural lashes have product buildup
For standard applications of wispy classic lash extensions, primer is helpful but not always required.
Step 1: Mapping Wispy Classic Lash Extensions
Mapping is one of the most important parts of creating wispy classic lash extensions.
A clean map ensures symmetry, balance, and consistent texture across the entire lash line.
A simple open-eye mapping might look like this:
Spike Lengths
13mm – 13mm – 12mm – 11mm – 10mm – 12mm – 11mm – 10mm
Base Layer
10mm – 9mm – 8mm – 7mm – 9mm – 8mm – 7mm
The spikes should be approximately 2–3 mm longerthan the base lashes.
This difference creates the textured look that defines wispy classic lash extensions.
Step 2: Creating the Spikes
Spikes are the defining feature of wispy classic lash extensions.
Instead of placing extensions on every natural lash, spikes are placed strategically throughout the lash line.
To create spikes:
- Isolate one natural lash.
- Attach 2–3 classic lashes together.
- Apply them to create a spike.
You don’t need spikes on every lash.
Most artists place spikes on 30–50% of the lashes, leaving space between them.
For example:
- Apply one spike
- Skip several natural lashes
- Place another spike
Spacing the spikes correctly helps maintain the airy look of wispy classic lash extensions.
Step 3: Filling Between the Spikes
Once spikes are placed, you fill the remaining lashes.
For wispy classic lash extensions, the filler lashes should be shorter.
Example:
If the spike length is 13mm, the filler lashes should be around 10mm.
This contrast creates the textured wispy appearance.
Some artists also use double classicsfor the filler layer by attaching two lashes together.
This adds fullness without creating volume fans.
Step 4: Lash Placement and Direction
Clean placement is critical when creating wispy classic lash extensions.
Every lash should be placed:
- Straight
- Parallel to the natural lash
- Without twisting
Poor direction can make spikes appear messy or uneven.
After applying a spike, use a lash mirror underneath the eye to check alignment.
This step helps keep your wispy classic lash extensionssymmetrical and professional.
Step 5: Choosing the Right Lash Adhesive
The glue you use plays a major role in lash retention.
Beginner lash artists should usually start with slower drying adhesives.
Slower glue allows more time to adjust placement before the adhesive cures.
When applying wispy classic lash extensions, follow this simple technique:
- Place the extension on the natural lash.
- Hold for 2–3 seconds.
- Release slowly.
Avoid touching or brushing the lash immediately after placement.
The adhesive still needs time to cure.
Step 6: Avoid This Common Beginner Mistake
Many beginner lash artists make one critical mistake:
They touch or brush the lashes immediately after applying them.
This can cause extensions to shift or detach before the adhesive fully sets.
When creating wispy classic lash extensions, always allow the glue to cure before adjusting lashes.
If a lash turns slightly after placement, gently reposition it instead of removing it immediately.
Patience leads to cleaner results.
Step 7: Keeping the Spikes Closed
One challenge with wispy classic lash extensionsis keeping spikes tight and clean.
Spikes can sometimes separate or lose their shape.
There are a few ways to fix this.
Use Water
Lightly touch the spike with a small amount of water to help it stay together.
Use Spike Gel
Some lash brands sell spike-specific gels designed to keep lashes closed.
Use Super Bonder
A tiny amount of bonder can help maintain spike structure.
These techniques help maintain the signature look of wispy classic lash extensions.
Step 8: Work in Sections
Another helpful technique is working in sections.
Instead of applying lashes next to each other continuously, move between sections of the eye.
This allows previously applied extensions time to dry.
For wispy classic lash extensions, working in sections prevents:
- Stickies
- Lash twisting
- Adhesive bonding issues
It also keeps the application organized.
The Final Result
When done correctly, wispy classic lash extensionsproduce a soft, textured lash line that looks both natural and styled.
The spikes create height and dimension while the shorter lashes provide fullness.
The result is:
- Clean texture
- Lightweight lashes
- Natural volume
- Elegant separation
Clients who don’t want dramatic volume sets often love wispy classic lash extensionsbecause they look effortless and stylish.
Why This Style Is Trending
In recent years, lash clients have started moving away from extremely heavy sets.
Instead, they want texture and dimension while still maintaining a natural appearance.
This is exactly why wispy classic lash extensionshave become so popular.
They give clients:
- Natural elegance
- Soft spikes
- A lightweight feel
- Custom styling
For lash artists, this technique is also extremely versatile.
You can combine wispy classic lash extensionswith different eye shapes and mapping styles to create endless variations.
Rated 5.0 ⭐ by hundreds of students • Licensed Educator • Trusted Lash Training Academy
LIMITLASHES™ — LASH TRAINING & CERTIFICATION
400 Commonwealth Ave G2, Boston, MA 02215
(781) 358-5881
www.limitlashes.com
Massachusetts Board of Cosmetology License: 7080417
Lash Trainer License: License #333-HS-11
We Build Lash Careers. Confidence Comes With It.
Tips for Beginner Lash Artists
If you are just starting your lash career, mastering wispy classic lash extensionscan set you apart from other beginner artists.
Focus on these fundamentals:
- Clean isolation
- Proper lash direction
- Balanced mapping
- Controlled adhesive usage
Most importantly, remember that lash artistry allows creativity.
You can adjust lengths, spacing, and spike placement to create your own signature style.
Learn Advanced Lash Techniques
If you want to improve your lash skills faster and grow your lash business, professional training can make a huge difference.
Many artists choose to enroll in advanced courses that teach:
- Classic lash mastery
- Volume techniques
- Wispy styling
- Lash business strategies
Programs like the in person lash training by Limitlashes™ help lash artists develop both technical skills and business knowledge.
Whether you’re a beginner or looking to expand your services, structured training can accelerate your growth.
Still Have Questions? — Answers from LimitLashes™
What’s the actual first step in how to become a lash trainer?
Do I need to be great at Volume to start learning how to become a lash trainer?
How do I price when I’m new to how to become a lash trainer?
What marketing channel works best for how to become a lash trainer?
I hate being on camera—can I still pursue how to become a lash trainer?
What should certification require if I’m serious about how to become a lash trainer?
How many students should I take in my first cohort while learning how to become a lash trainer?
How fast can I realistically fill my first lash training class?
Final Thoughts
For beginner lash artists looking to improve their work quickly, wispy classic lash extensionsare one of the best techniques to master.
They combine simplicity with creativity and allow you to create beautiful textured sets using only classic lashes.
By learning proper mapping, spike placement, and lash direction, you can produce results that look professional even early in your lash career.
The best part about wispy classic lash extensionsis their versatility. You can adapt them to almost any eye shape or client preference while maintaining a clean and natural appearance.
And remember: the beauty of lash artistry is creativity. Every set you create can be customized to match your client’s style while continuing to refine your skills as a lash artist.
Get in touch with Limitlashes™

Latest Podcast Episodes
Stay Ahead with Our Latest Discussions!

Join us on Feb 22, 2025, for an exclusive in-person event, “Glow Up, Cash Up & Leveling Up,” to master Instagram, YouTube, & Google and build your 6-figure lash empire.

3 Day Classic & Volume Lash Training & Certification
Embark on a journey to learn about successful marketing campaigns, social media and how to grow your lash business in 2024 and beyond using videos, organic content & paid advertising.